Microwave mug brownie and cake

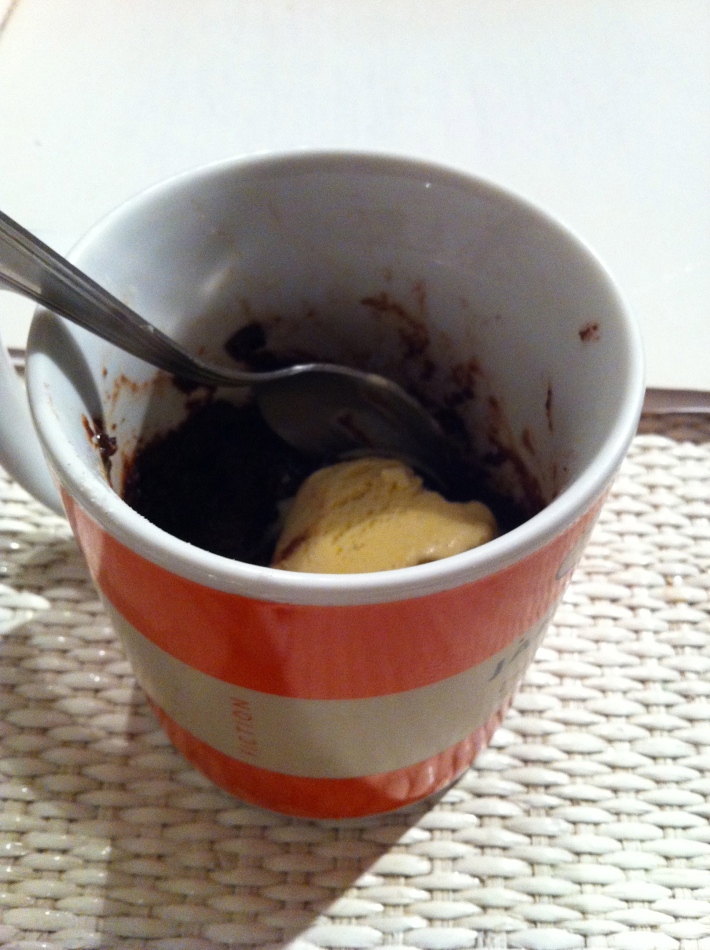
I’ve made microwave mug cake a fair number of times since my friend introduced me to it at uni last year – it’s dead easy and perfect student food for when you really can’t be bothered to wait for the oven (yep, I’m that lazy sometimes!). I’d never tried microwave brownie until last night, but it was sooooo goooood, easier than the cake and (whisper it) maybe even nicer… The brownie doesn’t look like much (and I don’t even have a photo of the cake), but that is no reflection on the taste!

Mug brownie (recipe adapted from here)

Image

This makes a decent-sized brownie for one, although it is half of the original recipe which must be massive! Cook it for less time if you like it gooey, more if you like it more cooked!

2 tbsp plain flour

2 tbsp sugar

1 scant tbsp cocoa

1 tbsp oil

1 tbsp water

– Mix ingredients in a mug.

– Microwave for approx. 45 seconds.

– That’s it! I put some ice-cream on top for extra yum!


Mug cake

This makes a cake big enough for two, but it’s tricky to halve because of the egg, so make it with a friend! You can adapt it in a million ways – the recipe here is for plain or chocolate, but we’ve also added mashed banana, or a spoonful of nutella, and everything seems to work!

6 tbsp flour (plain or self-raising) (or 5 tbsp flour and 1 tbsp cocoa, for chocolate cake)

4 tbsp sugar

1 egg

3 tbsp milk

3 tbsp oil

– Mix the dry ingredients in a reasonably large mug.

– Add the egg and mix, then add milk and oil and mix some more.

– Microwave for approx. 3 minutes

Sugar-free banana bread with raisins

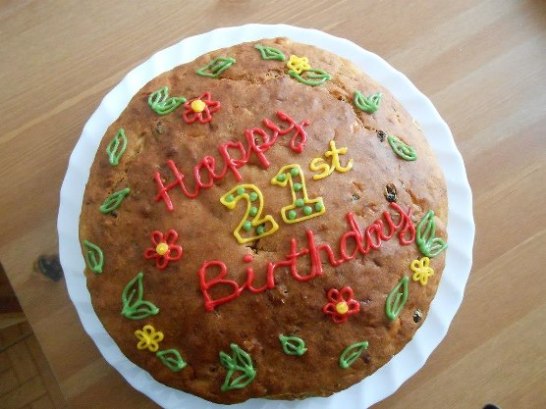
This bake came about when we wanted to make a birthday cake for a friend who’s given up sweet treats for Lent… I was a bit dubious about finding anything, but came across this recipe which doesn’t add any sugar. In fact, as it doesn’t add any fat either, I’m choosing to count it as health food! Traditionally it should be made in a loaf tin, but we didn’t have one so just used a round one. And I can’t take any credit for the icing, that was my far-more-artistic friend! The original recipe is here.

Image]

Ingredients:

2 cups plain flour

1 tsp cinnamon

1 1/2 tsp baking powder

1 cup raisins

Zest of 1 lemon

1 cup mashed ripe bananas (about 3) – if you only have underripe bananas see the tip below

3/4 cup orange juice

2 eggs, beaten

– Preheat oven to 175c and grease and line a loaf tin or 9 inch round tin.

– Mix flour, baking powder, cinnamon, raisins and lemon zest.

– In another bowl, beat the eggs, orange juice and bananas together.

– Add the dry ingredients to this and mix until just combined.

– Transfer to tin and bake for approx. 40 mins.

If you only have underripe bananas (as we did), place them in an oven on the lowest setting – approx. 50c – until you see the first brown spots appear, probably after half an hour or more. We accidentally left them in until the skins had turned entirely black but the insides were fine, if this happens you can just put them straight in the fridge to stop them ripening any further!

Chocolate and red wine cake

So I’m not sure why we decided to make an alcoholic cake, but somehow we did (and are now left with most of a bottle of nasty red wine, but it tastes fine in the cake!). Initially we were planning on cupcakes, but came across this recipe on smittenkitchen.com and had most of the ingredients already (plus it didn’t call for icing sugar, which doesn’t seem to be available here). It turned out really well – rich and dark, with a great chewy crust, wine-y, chocolate-y and cinnamon-y in equal parts. We ate it warm with ice-cream, and then had some more cold. Also with ice-cream…

601482_10200540124322583_1848390019_n

Ingredients:

85g (6 tablespoons) butter, at room temperature

1 cup brown granulated sugar (original calls for a mix of dark brown and white granulated, but this was all we could get; it worked fine)

1 egg + 1 egg yolk

3/4 cup red wine (cheap is fine, but you will be left with the rest of the bottle)

1 cup + 1 tbsp plain flour

1/2 cup cocoa powder

1 tsp baking powder

1/2 – 1 tsp cinnamon


– Preheat oven to 160c and grease and line a 9-inch cake tine.

– Beat the butter and then add the sugar and cream together. The combination of granulated sugar + doing it by hand meant ours didn’t cream very well and the cake was a bit speckley, but it didn’t seem to affect the taste!

– Beat in the eggs and then the wine.

– Sift over the flour, baking powder, cocoa and cinnamon and mix well.

– Pour into tin and bake for around 45 minutes (the original says 25-30 but ours was nowhere near done by then).

– Eat hot or cold, with ice-cream (or see the original recipe page for a marscapone-cream that we couldn’t face beating by hand).

Chocolate cupcakes with really easy chocolate ganache

My mum brought me supplies of cocoa and baking powder last weekend, yay! So yesterday I took the opportunity to use them in some chocolate cupcakes! The recipe is adapted from the Hummingbird bakery, one that my friend often uses so I knew it should be good, and best of all it doesn’t involve creaming (I haven’t got an electric whisk and and generally too lazy to cream by hand)! For the icing I made chocolate ganache (which I hadn’t ever tried before), but rather than using cream I used milk and butter, an idea I saw in one of the contributions to Nigella’s website (here), and this blog. I haven’t managed to find a muffin tray here, so I bought some silicon cupcake cases, which for some unknown reason were white, mustard yellow and moss green! I hadn’t ever used them before but they worked pretty well, I wasn’t sure whether I should grease them or not so I greased some, which made the cakes come out a bit more easily but the non-greased ones didn’t stick either.

Ingredients:

100g plain flour

140g sugar

20g cocoa powder

1 1/2 teaspoons baking powder

40g soft butter or margarine

120ml milk

1 egg


For the ganache:

100g dark chocolate

60ml milk

25g butter

– Preheat the oven to 170c.

-Mix the flour, sugar, cocoa and baking powder, and rub in the butter (or mix in a food processor).

– Mix the egg and milk in a jug. Add half to the dry ingredients and beat to mix and remove all the lumps.

– Add the remaining liquid and beat well; the batter is quite liquid.

– Divide between 12 cupcake cases and bake for 15-20 minutes.

– Make the ganache: place the butter and milk in a saucepan and heat until the butter has melted and the liquid has just boiled.

– Remove from the heat and add the chocolate, breaking it into small pieces. Wait a couple of minutes for it to melt, then beat together.

– Leave to cool and thicken for 10-15 minutes before icing the cakes.


Chocolate lemon shortbread flower!

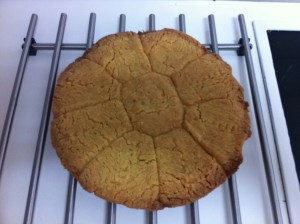
My mum and sister came to visit last weekend, and instead of birthday cake I made my mum a birthday shortbread flower! I adapted the shortbread recipe from the Be-Ro book, adding some lemon zest and then smothering the whole thing in chocolate, and it worked out quite well, although we started eating it before the chocolate had dried properly…

OK, so it’s not exactly high art, actually it looks a bit like a child’s drawing…but it tasted good!

Ingredients:

125g plain flour

40g sugar

90g butter, cut into small pieces

Grated zest of 1 small or 1/2 a large lemon

80g dark chocolate

– Heat the oven to 160c and grease an 8 inch round dish or cake tin, lining the base with greaseproof paper.

– Stir together the flour and sugar, then rub in the butter until it looks like breadcrumbs. Stir in the lemon zest.

– Knead the mix until it comes together.

– Roll into a thick sausage shape about 10cm long.

– Cut into 9 slices, and arrange in the dish in a flower shape. Prick the tops with a fork. This is what mine looked like before it went in:

– Bake for around 30 mins, until golden and brown round the edges. The shortbread should spread so the pieces join:

– Leave until completely cool, then melt the chocolate. Go round the flower shape in chocolate (I found the easiest way to do this was to use the wrong end of a spoon!)

– Spread the remaining chocolate on a sheet of greaseproof paper, spreading with a flat knife or cake slice to make sure it is even. Place the shortbread on top of this and leave to dry.

Some approximation of brownies…

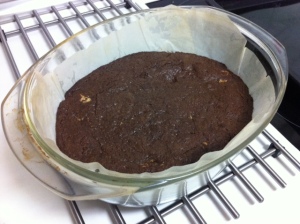
I found a recipe which doesn’t need baking powder or cocoa! If you thought I was going to be limited to pancakes for the year, think again! It’s the Hummingbird Bakery’s brownie recipe, which I found here, and though I didn’t have quite everything the recipe called for, I managed a pretty decent job (if I say it myself!). Unlike other brownie recipes I saw, which called for strange kinds of sugar – or at least, ones the average student probably doesn’t have lying around for tea-making – baking powder, nuts, cocoa, coconut oil and all sort of unlikely ingredients, this one is very simple, in terms of both ingredients and procedure. My friend’s best chocolate cake recipe is from the Hummingbird Bakery, so I knew it should be reliable, and so it turned out to be. Even if I did have to bake it in a casserole dish. And convert some of the measurements to cups in the absence of scales. (Not that I had a cup measure: I just used my mug and hoped!) It turned out well, although I probably could have left it in the oven a little longer as the centre was still very gooey; thankfully, though, I that’s how I like it best!

It felt good to be baking again – I can’t actually remember the last time I did! And as my classes so far have been fairly straightforward and not set much work, perhaps this is the year to perfect my skills and enter the Great British Bake Off… Actually I just remembered the disastrous fatless sponge…I have a long way to go…!

Ingredients:

200g dark chocolate (the only stuff I could get had ‘pepites’ in, which are crunchy bits of cocoa nib I think, but it didn’t seem to affect the finished product too much)

175g butter

325g caster sugar (or in my case, just over 1 and a half mugs full of granulated…)

130g plain flour (I used one mugful)

3 eggs (I whisked them slightly before I added them)

100g white chocolate, roughly chopped, or white chocolate chips (this isn’t in the original recipe but, well, you can never have too much chocolate, right?!)

23 x 33 x 5cm baking tin, or in my case an oval casserole dish, approx. 23 x 28 cm at the widest points, greased and lined.

– Preheat the oven to 170c

– Break the chocolate into pieces and chop the butter into chunks. Place both in a mixing bowl and melt, either in the microwave or over a pan of simmering water.

– Add the sugar and stir until all combined.

– Add the flour and stir to combine.

– Add the eggs and mix to combine thoroughly, then stir in the white chocolate; avoid mixing too much otherwise it will melt.

– Pour into the tin (or casserole dish!) and bake for 30-35 minutes (if you have a baking tin; mine took 40-45 mins and as I said was still soggy in the middle).

– Leave in the tin to cool before cutting.

Spanish supermarkets do not sell baking powder. This saddens me.

This was breakfast a couple of days ago: chocolate con churros in the Plaza Mayor (main square). The hot chocolate here is so thick and so yummy, and churros are sort of like doughnuts…so it’s not the healthiest of snacks but definitely one of the best! They didn’t come out so well in the photo as they were in the shade (and because I’m a terrible photographer at the best of times and was using my phone camera). Hopefully this photo captures a little bit of the amazingness of sitting outside in the square eating them though!

So, as I mentioned briefly in my previous post, I am currently on my year abroad in Spain! Our university had kindly organised for us to stay in halls, so when I discovered that the only cooking equipment I had was a microwave I thought this blog would have to undergo a rapid change of theme. But! Fear not! The halls turned out to be essentially boarding school, with a whole bunch of unreasonable rules and even more unreasonable prices, so we left. Freedom! And, more importantly, an oven! Yes, my new piso (flat) has a functioning oven, AND I have a three day weekend! Great, I thought, plenty of time for baking. Alas, our nearest supermarket doesn’t seem to stock baking powder, cocoa or self-raising flour. What?! Have I been thwarted, again? Well, hopefully not, as I am now going to embark on a quest for baking essentials and begin a year of baking! First step: looking up the Spanish names of these ingredients, just in case they’re on the shelf in disguise!

Wish me luck…!

Cupcakes in Krakow!

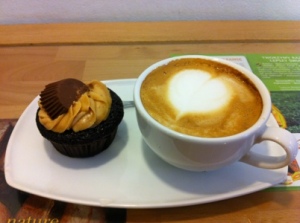
Long time, no blog! I’ve been traveling: first to France with my family, then to Krakow and Budapest with some friends from uni. We came across a lovely bakery in Krakow, almost next to where we were staying, which had some of the cutest and yummiest cupcakes I’ve ever had, and have definitely given me some inspiration for new flavours! Normally I’m not a fan of bought cupcakes – they seem to have too much sickly sweet icing and a fairly flavourless cake underneath. These were great, though: so good we went two days in a row! The first time I had chocolate covered strawberry cupcake, and the second time chocolate and peanut butter cupcake (I’m one of those people who will almost always choose a chocolate option, as the posts on here probably give away!). They were the cutest things, and for once were just as good as they looked! So I’m all inspired to bake some new cupcake flavour combinations when I get home – unfortunately I have less than a week at home before I go to Spain to start my year abroad so cupcake baking may take a back seat!

(The bakery in question was Cupcake Corner – the website gives some idea of the range of flavours they have – I quite fancy making black forest and brownie obsession as well… or just going back to Krakow to try them there…)

Grandma’s chocolate cake!

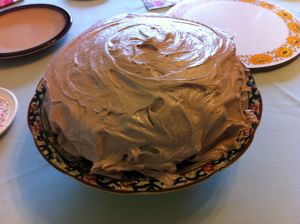
A couple of weeks ago we visited our grandparents, and while we were there we made this cake with my grandma, which is the same one she often makes when we visit. She’s a fabulous cook and often greets us with baked goods when we arrive, and this is one of our favourites: it’s chocolate cake (from a Marguerite Patten recipe in a 1970s recipe book!) filled with marzipan and iced with chocolate buttercream. In 80-something years of baking this is the best recipe she’s found, which is a pretty high recommendation! The marzipan filling isn’t in the recipe, and I don’t think I’ve ever come across marzipan in a chocolate cake anywhere else – it’s apparently the way her mother used to make chocolate cake, so I suppose it’s something of a family tradition!

Ingredients:

4oz margarine (110 g)

4oz sugar (caster/granulated) (110g)

1 tablespoon golden syrup, measured carefully because too much will make the cake sink in the middle

A few drops of vanilla essence

5oz self-raising flour (140g)

1oz cocoa (or 1 1/2 oz chocolate powder) (30g)

2 eggs

A little milk

– Preheat oven to 190c and grease and line a 7-inch cake tin.

– Cream together the margarine, sugar, vanilla essence and syrup.

– In separate bowls, sieve together the dry ingredients, and beat the eggs.

– Add the eggs and the flour mixture alternately to the creamed mixture, beating them in thoroughly.

– Add enough milk to make the mixture soft.

– Bake for 30 minutes (the original recipe says 1 and a quarter hours, but it would certainly have burnt, and probably caught fire, by then!)

To fill and ice:

200g marzipan

2-3 tbsp jam (strawberry or raspberry)

50g butter

200g icing sugar, sifted

1 dessertspoon cocoa mixed with a little boiling water (as little as possible)

– When the cake is cool, cut it in half horizontally.

– Roll out the marzipan into a circle the same size as the cake.

– Spread a thick layer of jam onto one half, then place the marzipan on top. Spread a little jam onto the bottom of the other half (so it sticks) and place on top of the marzipan.

– Make the buttercream icing by beating the butter and cocoa with a little icing sugar, gradually adding icing sugar until you have a thick icing. When I asked grandma how she made the icing, she said ‘well you just make buttercream’, so the quantities I’ve given are what I ended up using (the trick of dissolving cocoa in water is hers, though, and makes the icing runnier which is why it might look like a lot of icing sugar!)

– Ice the top and sides of the cake.

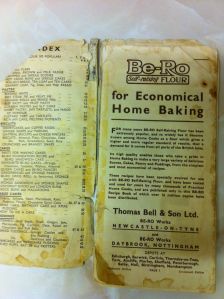
While we were staying with them, I also found grandma’s early edition BeRo book (which I wrote about here). I’m not sure exactly when it’s from, but there’s probably a fair chance it’s older than my mum, and it’s definitely well used:

Cappuccino cupcakes!

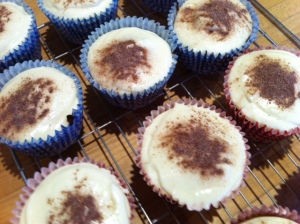
I must have made espresso cupcakes at least ten times, but because they’re so good, I’d never really considered the recipe on the opposite page, for cappuccino cupcakes. Until now, that is! And while I love how rich the espresso cupcakes are, with their dark chocolate in the cake and in the icing, these cappuccino cupcakes were certainly very good too: the sponge is quite a strong coffee sponge, and the icing is made with sweet white chocolate so they balance each other nicely. As usual when I make cupcakes, I did half the amount of icing suggested – is it just me who finds that most cupcake recipes make too much icing? If I had made the suggested amount, I am sure there would have been just too much sweet icing and they would have been rather sickly! As it was, the balance was pretty good. I think they look rather cute, too, with chocolate sprinkled over the top – just like real cappuccinos. Well, sort of! One day I would love to host a tea party with these, espresso cupcakes and earl grey cupcakes, and then serve lemonade out of teapots! (Too much?!). Like the espresso cupcakes, the recipe is originally from Nigella Lawson’s ‘How to be a domestic goddess’, one of my favourite ‘fancy’ baking books.

Ingredients (makes 12 cupcakes):

225g butter or margarine

225g self-raising flour

225g golden caster sugar

2 eggs

1 heaped tablespoon instant espresso powder

1 tsp baking powder

2-3 tablespoons milk

For the icing:

80g white chocolate (I used M&S ‘creme brulee’ chocolate as it was all I could find, which gave it a lovely caramel flavour)

30g butter

60g soured cream

130g icing sugar

A couple of teaspoons of cocoa powder or hot chocolate powder to sprinkle over


– Preheat the oven to 200c and line a 12-hole muffin tin with paper cases.

– Place all the cake ingredients apart from the milk in a blender, and pulse until combined.

– Gradually add the milk, while beating, until the batter is soft. I think I added a bit too much as it was quite runny, but it didn’t seem to matter!

– Divide between the cases and bake for around 20 minutes, then leave to cool completely before icing.

– For the icing, melt the chocolate and butter in the microwave, and leave to cool slightly before stirring in the soured cream.

– Gradually sift in the icing sugar while beating with an electric whisk.

– Spread a generous amount on each cupcake.

– If you like, sprinkle some cocoa powder or hot chocolate powder over the top to make them look like cappuccinos!